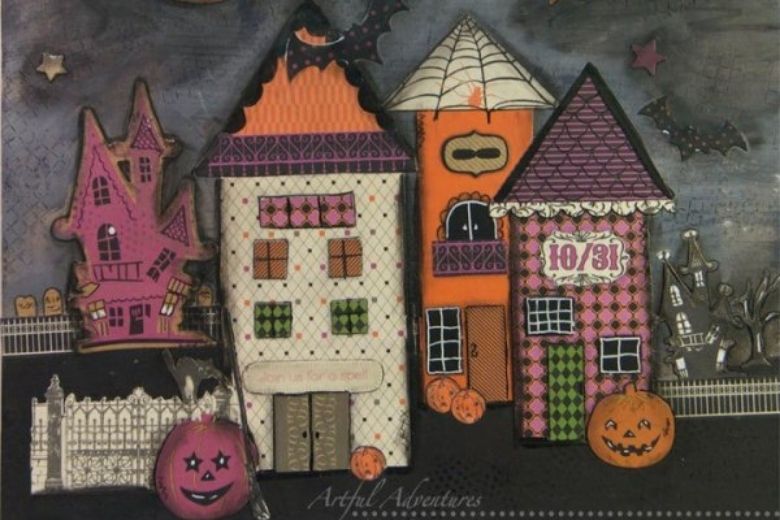
Using a scrapbook collection for a mixed media project
This mixed media Halloween project is created from a scrapbook paper collection. The project previously posted on the original Artful Adventures website. However, I have removed info about old products that were used and reposted it here. You’ll get the idea. I will apologize up front for the quality of the photography, but I hope you enjoy this idea for mixed media Halloween decor!
Halloween has become an incredibly big retail extravaganza, and as crafters I don’t think we will complain about how that has increased our options! There are always great Halloween themed scrapbook collections. I used one of those collections for this project.

Getting started on a Halloween Mixed Media piece
You can easily create a project from a scrapbook collection on a 12″ canvas. Paint the edges and you don’t even need to frame it. If you wanted to, you could use a canvas panel so that it would be thin enough to place in a regular picture frame.
First off, select what you’ll use for the background. I chose the Slate paper for the top or sky, and the black for the ground bottom. I cut a strip off the bottom of the Slate paper and then tore a tiny bit along the edge. That way, the layers ease together nicely. Now, use an adhesive medium to coat the back side of your paper. Turn it over onto the canvas add a layer of your medium over the top to seal it.

Next, I tore an edge on my Black paper to create the ground. Again, coat the back of the paper with your adhesive medium, turn it over onto the canvas and add another layer of the medium.

Next, you can either add some texture to the background or you could just continue to the next step. Adding several different textures can create interest, so I used black StazOn as well as some white paint and a bit of a dark purple ink. Yikes! Too much white! I quickly made a gray color. I then brushed this over the sky portion of my background and restamped my texture in StazOn.

Now for the real fun!
Now it was time to really start having some fun. Between the paper pack and some stickers from its coordinating set, there was a lot to play with. You can get a lot of mileage from a paper pack. Especially the cut-apart papers! Be sure to use them to their fullest. Here is what it looked like:

Adding details
Next I added details with a fine line marker, placed more stickers, and then used a black Pitt Pen to smudge around the edges of everything to give it more definition. I smudged in a bit more black into the sky to add a little more darkness. NOTE: You MUST have sealed everything with your medium over the top, even the stickers. The Pitt Pen will smear for a second as soon as you put it on, but it will not smudge if it is on unsealed paper. You have to act quickly, and you may need to dampen your finger, as well.
The last thing I did was use a white gel pen to add some final definition to a few areas. You’ll notice that I didn’t try to make perfectly straight lines. That’s it. Complete! Here are some close ups.


Here is the final piece. I may go back in and use my fine tip black pen to outline the witch and broom over the moon. What do you think?

Here is the FINAL piece. I went back in and outlined the witch!

Cheers to YOUR Artful Adventures!
Kristie
originally posted October 20, 2014
