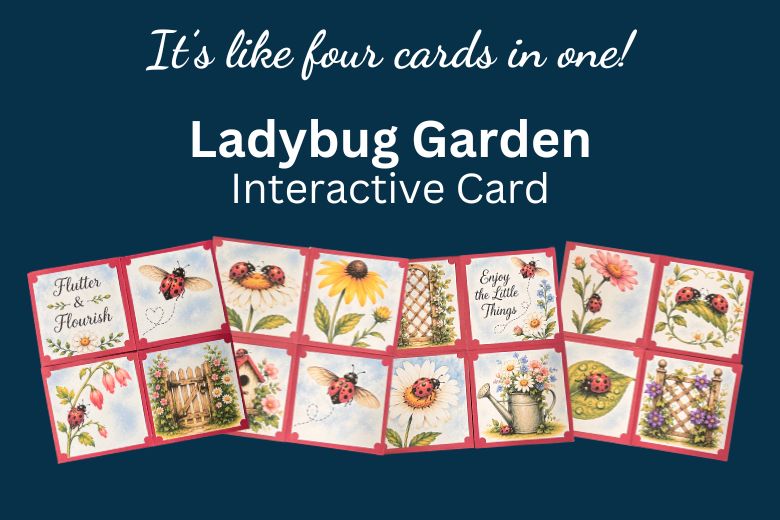
Have you ever made an interactive card that seems to keep unfolding? Infinity cards are one of those projects that surprise almost everyone the first time they see one. They may look complicated, but the basic folding technique is actually quite simple once you understand how it works.
For this Flutter & Flourish project, I created a cheerful Ladybug Garden version using watercolor flowers, ladybugs, and garden-inspired designs. While I chose a springtime theme, the same folding technique works for birthdays, Christmas, vintage papers, masculine cards, or just about any collection of papers you enjoy.
Starting with a Simple Square
This card begins with a 12 x 12-inch sheet of cardstock. Score the paper at 3, 6, and 9 inches in both directions to create sixteen equal squares. After making a few cuts and adding adhesive to just four corners, the card begins to transform into its unique interactive design.
One of the things I like most about this project is its flexibility. A 12 x 12 sheet creates a finished card that’s about 6 x 6 inches, but you don’t have to use that size. Any square piece of paper will work. Simply divide your square into a 4 x 4 grid, and you’ll have the same folding mechanism in whatever finished size you choose.
Helpful Tips Before You Assemble
While demonstrating this project, I shared a few little things that can make assembly easier. First, score and fold every line in both directions before you begin gluing. The folds become much more cooperative, and the finished card opens more smoothly.
It also helps to make your cuts carefully along the score lines. Since the card folds back and forth several different ways, accurate cuts will help everything line up and move easily.
If you’re printing your own decorative papers, don’t be surprised if different papers produce slightly different colors. Paper weight and brightness can both affect the finished look, even when using the same printer and settings.
Decorating Your Infinity Card
For this project, I designed a coordinating Ladybug Garden printable collection with decorative panels, sentiments, and patterned papers sized specifically for this card. I also experimented with notching the corners of each panel using a simple hole punch. It gave the finished card a little extra personality without adding another specialty tool.
Of course, the printable isn’t limited to infinity cards. The images and sentiments can also be used on MemoryDex cards, tags, ATCs, journal pages, scrapbook layouts, and many other paper crafting projects.
If you’d like to create this version, you can find the printable collection here:
Ladybug Garden Infinity Card Collection
Watch the Tutorial
In the video below, I’ll walk you through the complete process, including scoring, folding, cutting, assembling, and decorating the finished card. Along the way, I also share a few of the little discoveries I made while putting this project together.
I hope you’ll give an infinity card a try. Once you’ve made one, it’s easy to imagine all kinds of fun themes and occasions for making another!
Keep the Adventure Going!
If you enjoyed this project or information, I’d love for you to continue exploring more creative adventures here at My Artful Adventures — including paper crafting tutorials, junk journals, folios, mixed media projects, printable collections, and livestream inspiration.
Want more creative inspiration and free printables?
Join the Sunday Summary Newsletter and stay connected with new projects, videos, livestreams, printable collections, and creative updates from My Artful Adventures.
Cheers to YOUR Artful Adventures!
Kristie